How to Add a Custom RPC to MetaMask: The Ultimate Guide
MetaMask is the undisputed gateway to the decentralized web (Web3). By default, it connects seamlessly to the Ethereum Mainnet. However, as the cryptocurrency ecosystem has expanded into a multi-chain universe, users frequently need to interact with other networks such as Polygon, Arbitrum, Optimism, Base, and BNB Smart Chain. To access these alternative blockchains, you must add their custom Remote Procedure Call (RPC) networks to your MetaMask wallet.
In this comprehensive, step-by-step guide, we will walk you through everything you need to know about adding custom RPCs to MetaMask. We will cover two primary methods: the ultra-fast one-click method using Chainlist, and the manual method directly within the MetaMask interface.
Understanding RPCs and Why You Need Them
Before diving into the technical steps, it is essential to understand what an RPC is and why it matters.
What is an RPC?
RPC stands for Remote Procedure Call. In the context of blockchain technology, an RPC node acts as a bridge between your decentralized application (dApp) or wallet (like MetaMask) and the underlying blockchain network. When you want to view your token balance, send a transaction, or interact with a smart contract, your wallet sends a request to an RPC node. The node processes this request, communicates with the blockchain, and returns the result to your wallet.
Read more: Learn how blockchain explorers track transactions and wallets.
Why Add Custom RPCs to MetaMask?
MetaMask comes pre-configured with the Ethereum Mainnet RPC provided by Infura. While this is perfect for Ethereum-based activities, the Web3 space is much larger. You might want to add custom RPCs for several reasons:
- Accessing Alternative Blockchains (Alt-L1s): Networks like Solana (via specific EVM wrappers), Avalanche, and BNB Smart Chain operate independently of Ethereum. To use decentralized exchanges (DEXs) or NFT marketplaces on these chains, MetaMask needs to know how to communicate with them.
- Utilizing Layer 2 Scaling Solutions (L2s): Ethereum is known for high gas fees during peak times. Layer 2 networks like Arbitrum, Optimism, and Base process transactions off the main Ethereum chain to offer lower fees and faster speeds. You must add their specific RPCs to bridge your assets and trade on these L2s.
- Improving Performance and Privacy: Even if you are using Ethereum, the default public RPC might become congested. Adding a private or premium custom RPC can result in faster transaction broadcasting and enhanced privacy.
Now that we understand the “why,” let us explore the “how.”
The One-Click Way Using Chainlist
The easiest, fastest, and most error-free way to add a new network to MetaMask is by using Chainlist. Chainlist is a community-maintained directory of EVM-compatible networks that allows you to connect your wallet to the correct chain with just a few clicks.
Navigate to Chainlist
Open your web browser and navigate to the official Chainlist website atchainlist.org.
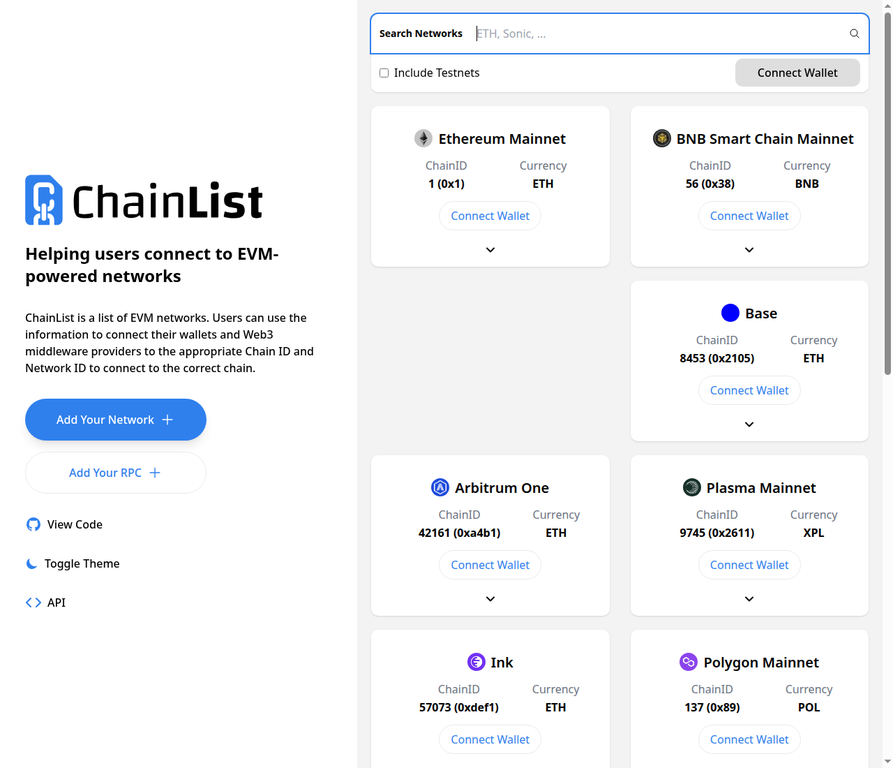 The Chainlist homepage displays a comprehensive list of EVM-compatible networks.
Search for Your Desired Network
At the top of the Chainlist homepage, you will find a search bar. Type the name of the network you want to add. For example, if you want to add Arbitrum, simply type “Arbitrum” into the search field.
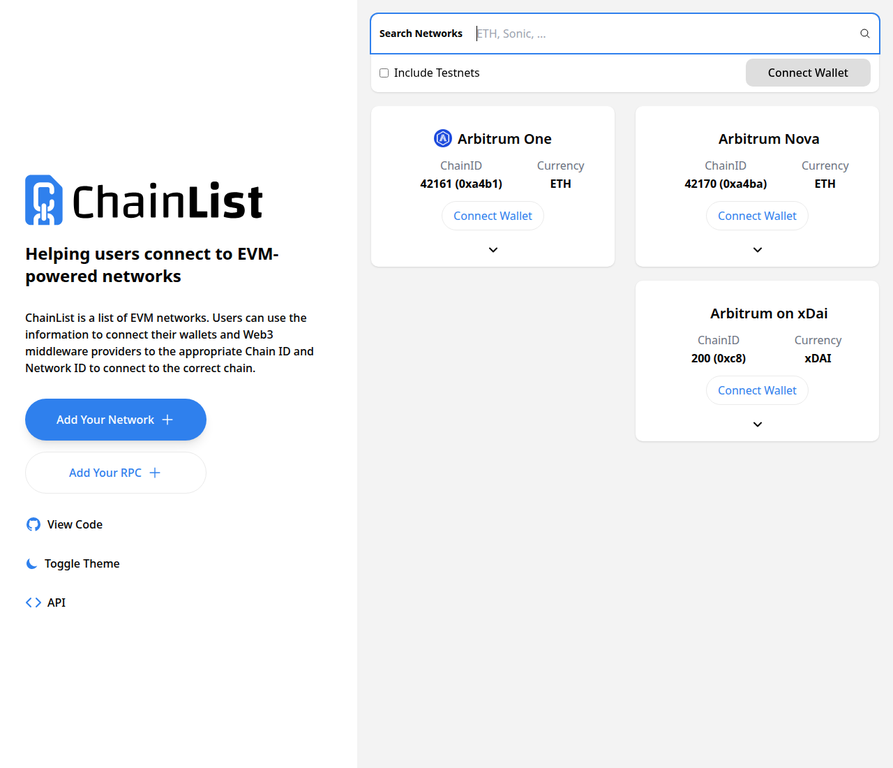 Searching for the Arbitrum network on Chainlist.
Connect Your Wallet and Add the Network
Once you locate the correct network in the search results:
- Click the “Connect Wallet” button located on the network card. MetaMask will prompt you to approve the connection to the Chainlist website.
- After connecting, the button will change to “Add to MetaMask”. Click it.
- MetaMask will open a prompt displaying the network details (Network Name, RPC URL, Chain ID, and Currency Symbol). Review these details to ensure they look correct.
- Click “Approve” to add the network to your wallet.
- MetaMask will then ask if you want to switch to the newly added network immediately. You can choose to switch or stay on your current network.
Exploring Alternative RPC URLs
Sometimes, a specific RPC endpoint might be slow or temporarily down. Chainlist provides a list of alternative RPC URLs for each network. You can view these by clicking the “Show RPC List” button (the downward-pointing arrow) on the network card.
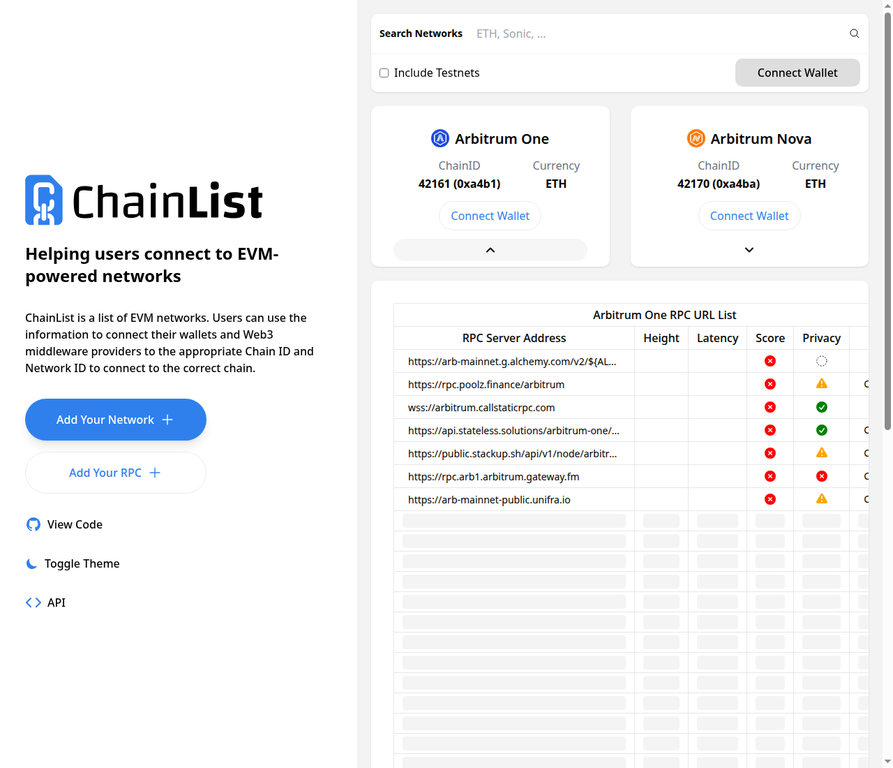 Expanding the RPC list on Chainlist allows you to choose from various public and private endpoints based on latency and privacy scores.
This method eliminates the need to manually copy and paste technical details, significantly reducing the risk of entering incorrect information.
The Manual Way via MetaMask Settings
While Chainlist is highly recommended, it is crucial to know how to add a network manually. This is necessary if Chainlist is unavailable, if you are connecting to a brand-new testnet not yet listed, or if you prefer to have absolute control over the RPC endpoint you are using.
To add a network manually, you will need four specific pieces of information:
- Network Name: A recognizable name for the network (e.g., “Polygon Mainnet”).
- New RPC URL: The web address of the RPC node.
- Chain ID: A unique mathematical identifier for the network.
- Currency Symbol: The ticker symbol for the network’s native gas token (e.g., “POL” for Polygon).
- Block Explorer URL (Optional but recommended): The website used to track transactions on that network (e.g., “https://polygonscan.com“).
Read more: Discover how to use Etherscan for transaction tracking.
Open MetaMask and Access the Network Selector
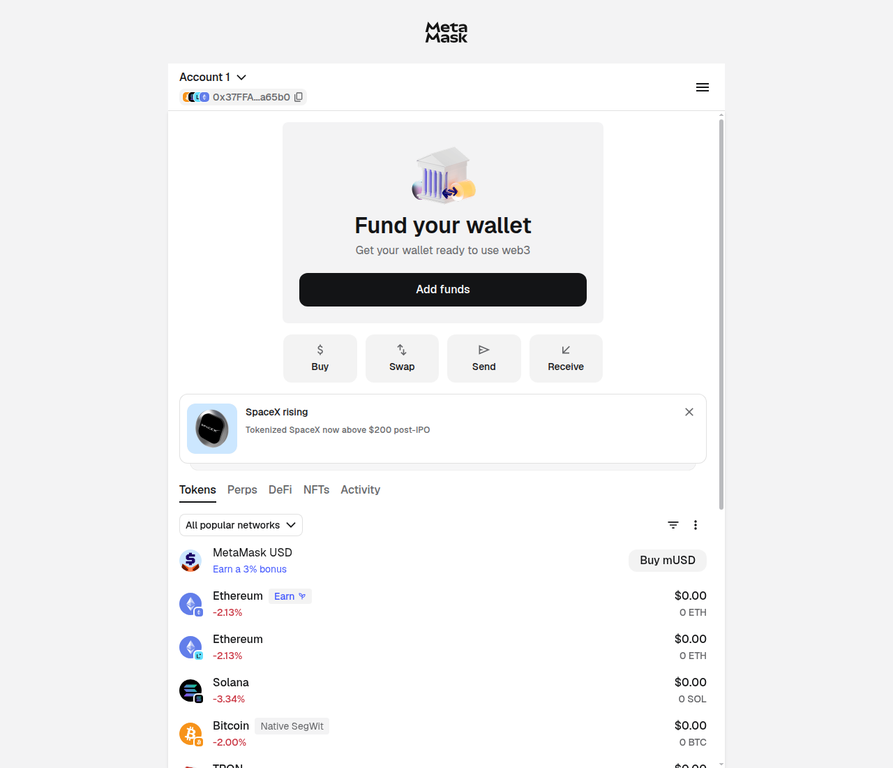
Click the MetaMask extension icon in your browser toolbar to open the wallet interface.
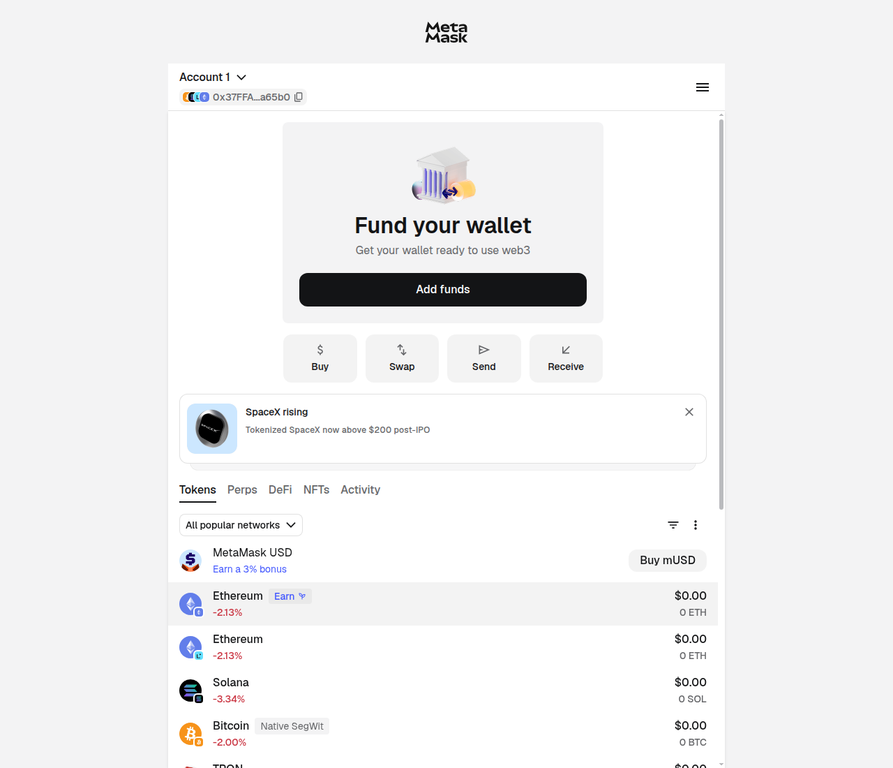 The default MetaMask home screen, typically connected to the Ethereum network.
Look at the top-left corner of the MetaMask interface. You will see a button displaying your currently connected network (usually “Ethereum Mainnet” with the Ethereum logo). Click this button to open the Network Selector dropdown menu.
 Clicking the network button opens the network switcher dropdown.
Navigate to “Add a Custom Network”
Scroll to the bottom of the Network Selector dropdown menu and click the “Add a custom network” button.
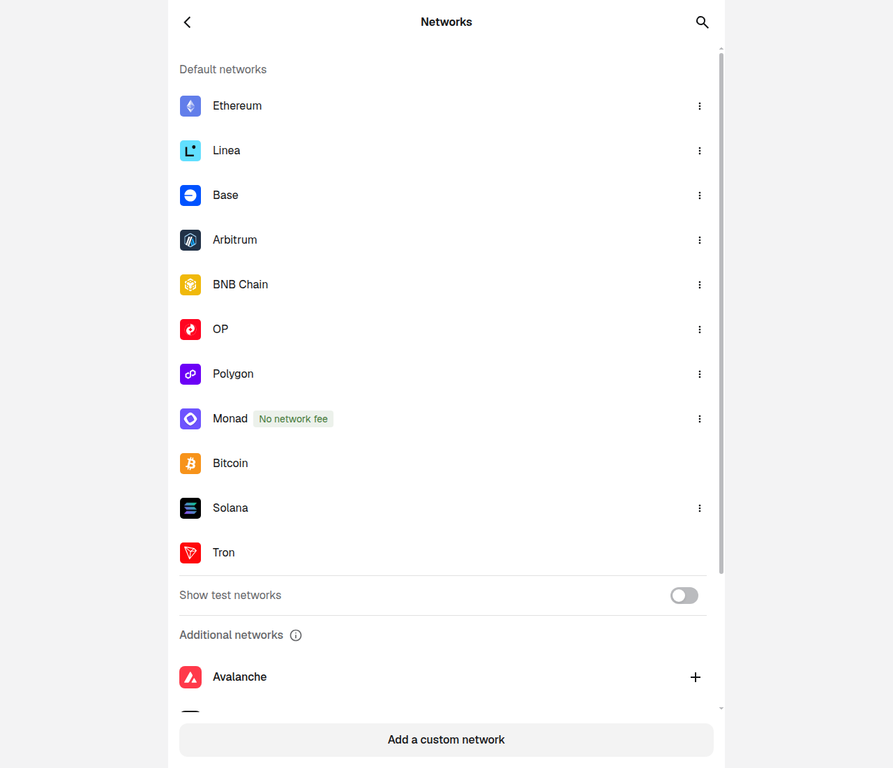 Scroll down the network list to find the “Add a custom network” option.
Enter the Network Details
You will be directed to the “Add network” settings page. This page contains a form with fields for the network details we mentioned earlier.
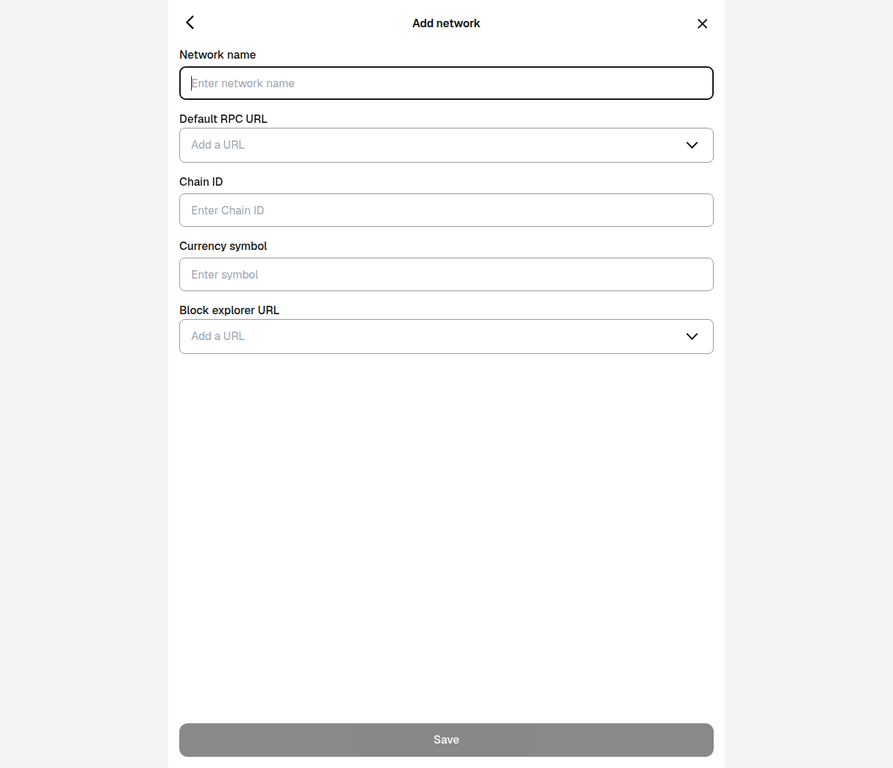 The empty form where you will manually input the custom RPC details.
Carefully copy and paste the required information into the respective fields. It is highly recommended to source this information directly from the official documentation of the network you are adding to avoid malicious endpoints.
Example: Adding Polygon Mainnet
- Network Name: Polygon Mainnet
- New RPC URL: https://polygon-rpc.com
- Chain ID: 137
- Currency Symbol: POL
- Block Explorer URL: https://polygonscan.com
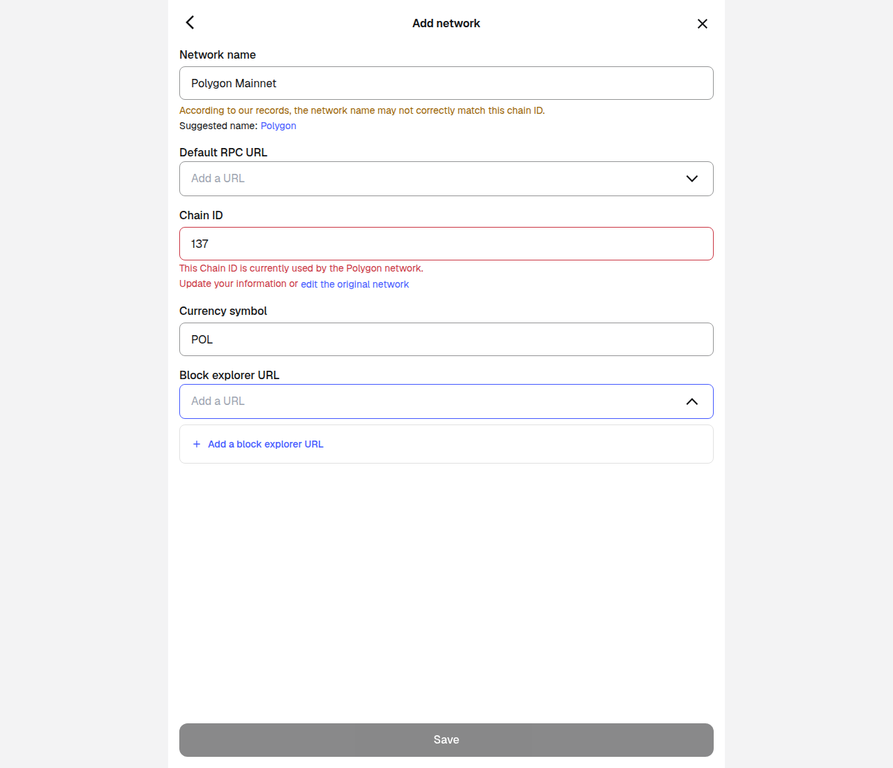 The form filled with the correct details for the Polygon Mainnet.
Once all the fields are filled correctly, the “Save” button at the bottom of the screen will become active. Click it to finalize the addition.
MetaMask will successfully add the network and typically switch you over to it immediately.
Verifying and Switching Between Networks
Congratulations! You have successfully added a custom RPC to your MetaMask wallet. But how do you verify it worked and switch between your newly added networks?
It is incredibly simple. Return to the main MetaMask home screen and click the network selector button in the top-left corner once again.
 The network selector now displays your newly added custom networks alongside the default options.
In the dropdown menu, you will now see the network you just added (e.g., Arbitrum or Polygon) listed alongside Ethereum. Simply click on the name of the network you wish to use.
MetaMask will instantly switch your connection. You will notice that the native currency symbol and your balance will update to reflect the new network. You are now ready to interact with dApps, bridge assets, and explore the broader Web3 ecosystem on your chosen blockchain!
Read more: Explore DeFi analytics and blockchain research tools.
Important Security Considerations
When dealing with custom RPCs, security should be your top priority. A malicious RPC endpoint can log your IP address, track your transaction history, or, in severe cases, feed your wallet incorrect data (like fake token balances) to trick you into signing malicious transactions.
Always adhere to these best practices:
- Use Official Sources: Whenever possible, obtain RPC URLs directly from the official website or documentation of the blockchain network.
- Trust Chainlist: Chainlist is widely regarded as a safe and reliable tool because it is open-source and community-vetted.
- Beware of Phishing: Scammers often create fake tutorials or support messages containing malicious RPC URLs. Never copy RPC details from unverified social media posts, direct messages, or suspicious websites.
By following this guide, you have unlocked the full multi-chain potential of your MetaMask wallet. Happy exploring!

You May Also Like

Iran’s army chief warns of ‘total destruction’ for ground invasion

Fed Governor Calls For Strong Stablecoin Oversight As CLARITY Act’s Final Text Gets Delayed

Why Businesses Need Professional Machine Design and Development Services